Once again trying to make fondant flowers. This is a totally different technique than I have used before and it came out...well, OK at best. I think the main problem was the consistency of the gumpaste/fondant mixture. I kept re-rolling and it dried out quicker than I expected despite my efforts of keeping everything under saran wrap. Due to the drying out the edges cracked some, and it was also my first time using the ball tool to frill the edges.
Started out with a center this time, and wrapped up alternating petals. This is with one layer done
The finished product has 3 layers done and I added in some texture to the center - it doesn't looks too bad from this angle, even though the edges are tearing/cracking
I'm wondering if I should try going with tylose powder or pre-made gumpaste...
~emy
My Blog About Random Junk
Sunday, March 25, 2012
Thursday, February 9, 2012
Fondant Flowers: Attempt #2
The saga continues. This time I bought the Wilton Gum Paste Mix so my flowers (well it ended up being flower) dried hard. The mix comes in a 1lb can and says you add 1/4 cup of water to 1lb to make the paste. I didn't want to use it all, so I decided to use 1/8th of a cup of the mix which is 1/16th of a pound, and then added in water by the half teaspoon and ended up adding in 1 teaspoon of water. It was slightly sticky so I kneaded in powdered sugar until the stickiness went away.
I then rolled the gum paste into a ball, made a ball of marshmallow fondant the same size, and then mixed the two together. I then did the same flower technique as last time and after drying time got this:
I think it turned out okay. It definitely held its shape a lot better. I probably could have tried harder making the center, but I actually messed up my first small batch of gum paste (too much water) and it was getting late. I also tried using a different flower cutter but it didn't work out so well, because the petals were kind of separated, causing it to tear - and I didn't have graduated sizes. Those cutters might be my next investment. I refuse to get the forming cups yet though - I read you can put foil over cupcake tins at the depth you want and it works out well, so I'll be trying that next time.
~emy
Wednesday, January 25, 2012
Fondant Flowers: Attempt #1
So I tried to make some sugar flowers, well one sugar flower and considering I don't have any proper flower making tools it came out looking ok.
First I cut out 3 different sizes of flower petal layers - these are actually from cookie and biscuit cutters and I wish the sizes varied a bit more but it worked:
Then I used a toothpick and rolled the pointed end around the edges of each circle to "frill" the edges up as seen below. This actually hurt my fingers a bit - this is probably why people will use a stick the size of a pencil, so it'll hurt less
Then I inset them inside themselves using a little bit of water in the center to hold the layers together and arranged the petals. For the center one I actually loosely folded in in half twice to make a more compact center
In this picture the flower is sitting in the smallest ring cutter to help hold the shape. Since I only have 1 small cutter I think I might used something like an plastic lined egg carton to hold more flowers at a time. Another thing was that this shape didn't hold together that well immediately after, I think fondant might be too soft to work with - gumpaste is supposed to be stiffer, but I've never used or made it before. Maybe if I placed the fondant flowers in the freezer they would harden up and hold keep their shape. Not bad for a first attempt though right?
~emy
Monday, November 21, 2011
Movie Review: Being Elmo
This weekend we went to see Being Elmo. We had to drive 30 minutes and sit in a hot and kind of stinky theater, but it was definitely worth it.
The movie is basically the story of Kevin Clash, the man who is the movement, voice and personality of the beloved muppet Elmo. The film first chronicles his childhood, during which his love of puppets started and grew, and moves on to his career as a puppeteer. We learned how he met adversity from his peers, but gained confidence and knowledge by working with masters like Jim Henson and Frank Oz (Kermit & Miss Piggy, as well as Ernie & Bert for those of you who don't know). And of course we find out how Elmo came to be and how Clash has been dedicated to the essence of Elmo's character throughout the tremendous growth in the little red puppet's popularity.
My thoughts on the film; well like the poster says it was a "feel good movie". I was amazed that Clash was able to find his passion at such a young age, and makes it into something fantastic, especially when I feel most of us might never find out true passion. I know I haven't found mine yet. I also enjoyed the fact that Clash is a genuinely good person and that it comes through the love Elmo shows towards everyone. I know I would have been thoroughly disappointed if Clash turned out to be a jerks, and my perceptions of Elmo as pure niceness ruined.
One other thing I have to mention about this film was I was so surprised about how much old footage they had. For instance, they have film of the first meeting between Clash and renowned puppet maker Kermit Love. How the heck did they get that?! The story was that Clash went off on his own to meet Love while on a school trip to NYC, but it's all filmed as if they had been making the documentary all along. Baffling to me, but quite cool that they had it.
Check here to see if Being Elmo is playing by you. If it's not, there's an option that let's you "demand it" to try to get it playing in your town.
~emy
Labels:
Being Elmo,
Kevin Clash,
Movie,
muppets,
puppets,
review
Wednesday, October 26, 2011
Sandwich (and soda can) Cake!
Another birthday mean another cake. Actually 2 cakes in this case - though one was more of a cake wreck :(
Why a sandwich? Well really it was supposed to be the Coca-Cola can due to the birthday-er's addiction to Coke, and a sandwich with a coke seemed to be at good match at the time.
So here's how it went:
Leveling off the cake to make the bread - because no one wants domed bread aka the end slice - with my super awesome leveler thingy. In this case I actually pulled the cake on the pan and kept the leveler still
Carved out slices of bread - meant to make them more even in size, but it actually worked out okay because you could see the toppings more with the smaller piece on top
Made it in to white bread! Maybe if I used just white cake instead of Funfetti I could have just done crust as it would have already been white. Pizza cutter worked much better than the butter knife I've used in the past.
Now the crust! It was actually really hard to get one long piece for the crust - I had to do it in pieces and had a hard time getting rid of the seams, but did the best I could
Rounds for soda can cut of out of leveled chocolate cake using hamburger patty maker thing
Three stacked rounds not so bad - couple of straws for support
Five doesn't look so bad here but it was a problem because the cakes were so airy and not dense enough so the bottom layer was actually crumbling/collapsing under the weight :(
It looks passable from the top
But not from the side - oh yea the saran wrap was an attempt to hold it together while it was in the freezer to maintain the shape, it kinda worked...
I even had a frozen butter cream transfer to put on the can - but it was too lumpy and falling a part
On the bright side here are some finished sandwich shots
I think the fondant bacon turned out pretty well
I wish i had a picture to show the scale - maybe one of my friends will have one
~emy
Friday, September 23, 2011
Experimental Baking - w. Twin - Irish Carbomb Cupcakes
I guess it's not P.C. to say Irish Carbomb cupcakes - but I was making them with and Irish person, and my name sounds Irish so maybe it's okay this time?
These cupcakes weren't for any particular reason except for my friend sending me some handy tools to make baking easier so we decided to try them out using Smitten Kitchen's Recipe. with some changes of our own. It's basically a chocolate Guinness cupcake, with whiskey ganache filling and Bailey's buttercream frosting. Unfortunately my pictures are a little blurry - oh well.
Okay so here's the batter - something to note is that it seemed to be runnier than other cupcake batters. We thought something might have been measured wrong due to it's low viscosity, but it all worked out in the end
Bakes cupcakes! The do rise some so best not to over fill the cupcake papers
The corer! It looked like it was going to take WAY too much out of the middle, but it was the perfect amount
24 Cupcakes - just like the recipe said
Filling with whiskey ganache with another handy tool.
Note on the ganache we did the following changes: less butter more whiskey, diff chocolate
Ganache Filling
8 ounces semi-sweet chocolate (we used chocolate chips - you don't have to chop it up that way)
2/3 cup heavy cream
1/2 tablespoons butter, room temperature
4 teaspoons Irish whiskey
Frosted cupcakes - we weren't that good at using the icing tool - but we had fun decorating. Some got the ganache mixed into the frosting because we didn't replace any part of the core (because we had already eaten them...)
For the frosting we didn't measure out the powder sugar - we just added it to the stick of butter & Bailey's until we liked the flavor, texture and consistency. I believe we did 3 Bailey's and 1 heavy cream.
~emy
Friday, August 19, 2011
Chihuly: Through the Looking Glass at the MFA
This adventure is from a while back, but over the 4th of July weekend we took advantage of the MFA's Free Fun Friday and went to see the Chihuly: Through the Looking Glass exhibit. In the past I've seen some other Chihuly pieces at the Bellagio Hotel in Las Vegas, the Albert and Victoria Museum in London, and the Mohegan Sun Casino in CT but this exhibit was great because you could get so close to the glass. There was also a special movie showing Chihuly through the years in action with his team creating new installations around the world. Here are some of the shots I got.
From a distance I thought this one was a real plant. It was custom made for the MFA's atrium and they are trying to raise the money to buy the piece for the permanent collection
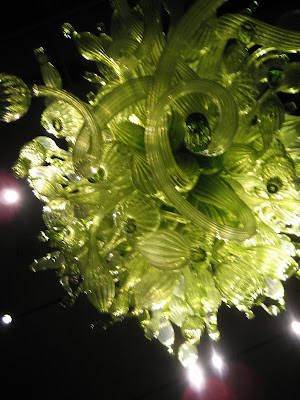
Chandeliers!
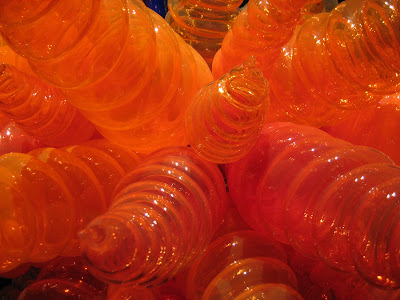
Close Up - looks like orange grubs
Zoomed out - still kinda looks like orange grubs
This is a shot of underneath ones of the chandeliers.
I took this photo and then like 5 other people turned around to take the same one.
Kind of a funny narration about the next photo
Close ups
Glass mystical forest
Glass in a boat - the mirror reflecting was cool too.
One last light
~emy
Wednesday, August 3, 2011
Experimental Cooking - Grilled Pizza
Much like the Jersey Shore my friends and I have started to have a weekly family dinner on Sunday night. Granted this has only happened twice and the next few weeks are iffy and then football will start. So maybe it will be very short lived but it has been a lot of fun.
Getting to the food point. It's summer which mean pulling out the grill, but hot dogs, hamburgers and grilled chicken was getting old, so we decided to try out grilled pizza. It didn't seem that hard roll out dough, brush with olive oil, grill add toppings, grill some more. All the article about grilling pizza said the key was being organized, which we were - but that didn't help out our first pizza from being half a disaster. I say half because only half of it burned into an blackened mess.
Key point missing from all of those "How to grill pizza" articles: Cook smaller pizzas!!! Don't use all the dough at once!!! Being lazy, we bought pre-made dough and mistakenly rolled the whole thing out and try to put it all on the grill at once. It folded on itself and wasn't really spread out because it was super hard to get on the grill. The 2nd rolled out pizza we cut into 3 smaller pieces and it worked out soooo much better.
Check out the results - the messed up pizza isn't there, though we did eat it still:
Closest pizza = arugula, prosciutto and cheese
Middle = cheese
Farthest = grilled peppers & onions and cheese (it was also kinda shaped like the USA, but it's hard to tell from this angle)
~emy
Labels:
cooking,
experimental cooking,
grill,
grilled pizza,
pizza
Subscribe to:
Posts (Atom)